

Last updated on July 27, 2026
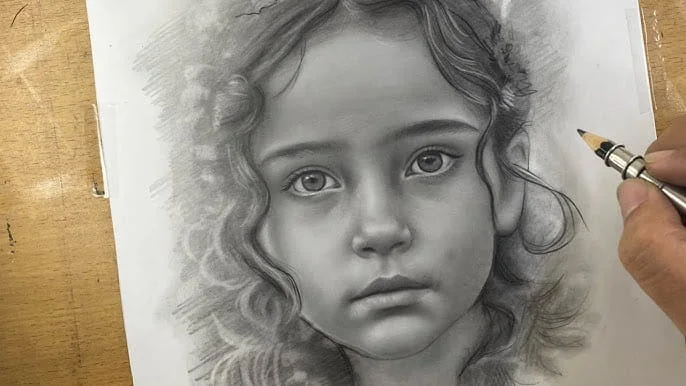
If you want to learn How To Make Realistic Portrait using Tips-Tools and Techniques professionals use. It is a dream of every artist to make a realistic portrait, but most of them don’t know how to do that. Either they just keep trying and trying making portraits and nothing changes or they just simply give up.
What if i tell you that, now you can make realistic portraits all by yourself. In this article i will tell you the tips, tools and techniques, by using which you can make more realistic portraits. These blogs will help you to make professional portraits.
Don’t Just Copy, Understand First
Most of us, when it comes to making a realistic portrait, think to copy the exact details. We try to make each and every detail, like the nose, the lips, the eyes. That is the first mistake we all do, never try to copy details, always understand the structure of the image or the person first. When you understand the basic structure then only you can make a realistic drawing.
Understand the connection between the features and try to draw that connection well. The portrait will automatically look real and professional.
Step to Make a Realistic Portrait
Make a Rough Outline of The Portrait
Before we create anything we make a rough outline of the basic structure. While making a realistic portrait our first task is to make the basic structure of the person or the reference. If the structures itself won’t match the reference then no matter how hard you try the portrait wont look real.
Technique
To make the outline or structure use the basic shapes method to create it. First observe the basic shape in the portrait and try to make it correctly. The height, the width and the shape of the portrait must be correct and similar to the reference.
Tools
You can use the 2H and HB pencils to make the basic outlines and structures. You can even use the mechanical pencil as well as they both are light and easy to erase with a normal eraser.
Make The Proportion
Once you are done with the Basic structure, the next step is the proportion of the portrait. Make facial measurements like the position of eyes, nose, lips etc. keep these proportions right as they give you the framework on which you can work effectively.
Technique
To make the right proportion use the guideline method, draw a guide line for the eyes in the middle of the top of the head and chin. To make the nose make two lines vertically from the tear ducts of the eyes and make an inverted triangle. For the lips use and chin as guide and draw lips in the middle of them with the width upto the pupil of the both eyes. At last for ears draw a guide line horizontally from eye brows and form the bottom of the nose.
Tools
To make these proportions you can use the basic HB pencils and a mechanical pencil as tools. These will give you shape and light lines that can be erased and remade if a mistake happens.
Add The Features
After you have made the proportions, it’s time to add the actual features of these proportions. To make realistic art you must draw the features to add depth and more realism. Add eye brows, eye lashes and pupils of the eyes. Understand the structure of the nose and make nostrils and nose tips. Focus on the lips, the curves and the smile, add hair details and at last the skin and the texture.
Tools
To add these features to your artwork, you can use the middle tone pencils. HB and 2B pencils will do the work effectively and will make the portrait look realistic.
Make Tones and Shade
Now comes the real turning point, this part changes the overall appearance of the art. Shading and tone make your art more realistic rather than a plain drawing. Make sure you know how to shade a drawing with light and shadow. Add tone to the larger area first, rather than the small area. Give yourself a solid base to work on and try to have your portrait unified yet detailed.
Technique
Make the tone along with the flow of the portrait, instead of randomly shading. Observe the contours of the face and try to make the stroke along with that contours. This will give you a 3D look rather than the flat shade.
Tools
When it comes to shading and toning the portrait always use the pencils with high graphite. 2B and 4B pencils are more useful here or you can use the clutch pencil (lead holder) to do so. If you are familiar with the charcoal sticks you can use them as well.
Give Finishing To The Artwork
Moving on to the final yet important part that will make the portrait realistic and natural. Once all the steps are completed and you are satisfied with your work, give it the finishing touch. Make the shading smooth and blend it properly, this will enhance the overall look and feel of the portrait. Always check your art from a distance for a better look and view.
Tools
To blend the tones and shading you can use a blending stump. If you don’t have it you can also use a tissue paper to evenly blend the sharp edges and make the tones look smooth and realistic.
In the art world there is no secret trick to master the skill, all you have to do is practice more and more. Perfection doesn’t come instantly, it comes by making mistakes and correcting them. Once you learn to identify your mistakes and loose ends, all you have to do is work on them.
To make a realistic portrait use and practice these tips, tools and techniques on regular basis, so that you can master them. Always remember practice is what make a realistic portrait not tips, tools or techniques, so keep making art.
