

Last updated on July 27, 2026
You have always heard the word shading or How to Shade a Drawing As a Beginners. Ever thought why every artist gave specific focus on shading, let me tell you. The major part of a drawing is not the drawing but the shading. Shading gives the drawing life by which the art feels alive and realistic.
Shading makes a simple looking line and shapes more attractive and adds the three dimensional look to the art work. Now most of you will think that it’s a tough job to do, that the beauty of art. Shading looks tough but it’s just a matter of light and shadow, nothing more. Once you understand the phenomena of light and shadow, you’re good to go.
In this blog I’ll tell you How to Shade a Drawing, a Guide for Beginners you can use to understand the shading concept.
What is Shading and How To Shade A Drawing
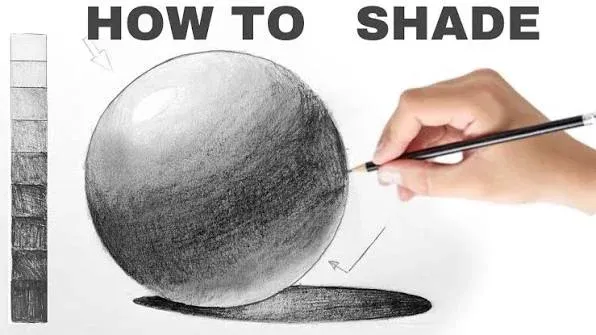
Look around yourself, the world is a three dimensional object. Each object has its shadow created by the reflection of light. The light creates dark and light zones near the objects that give them the 3D look. As an artist, making the same effect of light and shadow on paper is called shading.
Shading an artwork is as important as making its outlines. When you shade a drawing gives it a realistic look even on the paper. The more shading details are present in the art the more it looks realistic and convincing.
Learn How to Do Shading in a Drawing
Observe the Value of Shade
To actually learn How to Shade a Drawing As a Beginners, you need to understand its value. Now what I mean by value here is, the darkness and lightness of the shade. Value in drawing means the darkness and lightness tones created by light when it falls on the object.
Before starting shading observe these values so that you can understand the concept easily. Try and observe your surroundings to figure out these values and try to practice them on paper.
Fix the Light Source First
While giving the shadow and shading, always remember the light source. Keep the light source fixed the entire time, that means always imagine the light direction remains the same the whole time.
To understand this, take some objects and place them on the table. Now take a light source like a torch or bulb and point it toward the object.now observe that the shadow of each object is formed in the same direction. Similarly always keep the shading in the same direction while drawing.
Understand the Core Zones Of Shading and Shadow
When a light hits an object it creates light zones or shadow zones. These zones play an important role in shading a drawing or artwork. Most there are five light zones in every artwork and these are:
Highlight
Highlight is the point where the light touches the object. In other words, highlight is the most light part of the art where light directly focuses. While drawing the highlight part, remember that it is the lightest tone or white sometimes.
Midtone
As its name says midtone, it is the portion between the Highlight and the Shadow. Midtone is the part of the object that stays in the light. Generally in Midzone the object’s texture or color remains unchanged or local (in art language). It shows the actual shade of the drawing.
Core Shadow
This is the point from where the shadow starts to form. Just after the Midtone the shadow of the object forms on the object itself is called core shadow. Core shadow is the darkest tone of the shading.
Reflected Light
Reflected light is a tiny but important part of shading a drawing. When you observe an object, you will notice that in the core shadow zone there is a light part right before the object and the surface. This dim light zone is created due to the reflection of the surface on the object.
Cast Shadow
Cast shadow is the actual shadow of the object that falls on the surface and surrounding. It is darker near the object and fades going away from the object.
Practice on Basic Shapes First
Instead of going on hard and complex shapes and figures try practicing on basic shapes. Practicing on basic shapes gives you simple and effective observation skills. As we all know that all the shapes of figures are made up of the basic shapes.
Once you master shading the basic shapes you can move on to complex shapes and figures.
Use The Basic Sketching Techniques
There is no definite technique for shading for anyone. Different artists have unique styles of shading their artwork differently. Different objects suit different shading and sketching style and technique, there for here are some basic sketching techniques you can practice.
- Hatching
- Cross Hatching
- Stippling
- Blending
Avoid Making These Mistakes While Shading
Use a proper light source while shading the drawing, because without a proper light source you won’t be able to make the shadow effect.
Stop using complex objects or figures for the initial phase. In the beginning your goal is to learn, not make professional art. Take basic shapes as reference and start practicing.
Practice once in a while will not improve your shading. Therefore you need regular practice. That helps you maintain the flow and learn quickly. Practice daily for 10 min only for shading.
Shading a drawing does not need any special skill. It’s just a matter of time and proper practice and interest. With proper practice and time anyone can master the shading and can make art. The most important task is to observe. The more you observe your surroundings, the more you will understand the depth of art and sketching.
